Sunday, June 26, 2011

The Seahorse

I was given a seahorse wall bracket and I wasn't loving the colors on it.  I had attempted to spray paint it white, but there was so much texture on the bracket, the spray paint was never going to cover it.  I had actually put this away in the closet for at least a year.

Then Rosemary over at Villabarnes joined my Home Sweet Home party a week ago and showed us about Gesso as an alternative to paint. (Click the link to view that post.)   I immediately thought of this seahorse bracket I had shelved.  So, in this picture a helper and I are applying Gesso.

The gesso is very chalky.  It goes on really easily and is very forgiving to work with.  It dries fast so I sanded the bracket, but being polyresin it just didn't give the aged look from a sanding that wood does.

So, Rosemary said you can mix colors with it.  So,  I mixed up an aqua for the plant element on the bracket.

The original aqua was too much color for the washed out chalky look I was getting with this.  Then I mixed Gesso right into the paint and got a much more subtle aqua that was just right.  I painted a few tan highlights to the sanded parts of the seahorse and then I stopped, not wanting to reapply too much color.

This is the first time I have used the Gesso.  It is easy to work with, water soluble, dries quick, can be mixed with any paint color, and can be finished with wax or polyurethane.  My next try with it will be a piece of furniture.  It is also readily available at Walmart, 16 ozs. for under $8.  Gesso is an affordable alternative to straight paint with a finish you can age and get some interesting looks out of.  (Cost: bracket: free, Gesso $ 7.89, other supplies: I had.)
Sherry
I will link this to:
Metamorphosis Monday  at Between Naps on the Porch
Nifty Thrifty Tuesdays at Coastal Charm
Wow Us Wednesday  at Savvy Southern Style
Thrifty Thursday  at Tales from Bloggeritaville 
Thrifty Things Friday at A La Carte
Thrifty Things Friday at The Thrifty Groove

Thursday, June 23, 2011

Home Sweet Home #20

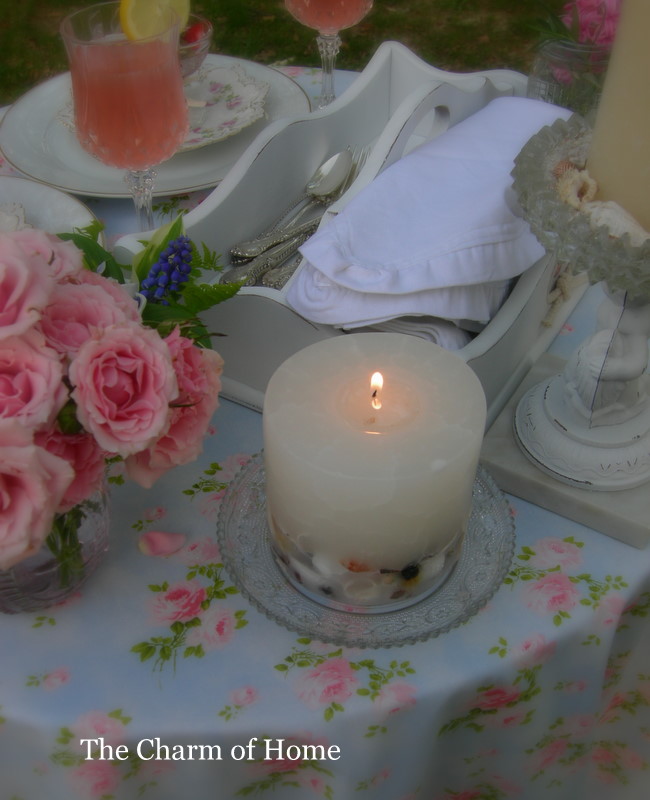
Welcome to Home Sweet Home today!  I have put together a little shabby style sea shell table with vintage linens and Limoges.  It has been raining so much going outside to photograph a table has been a challenge.  So, this table started indoors.

Finally, a nice afternoon so I take it outside too.

Here the late afternoon light will get some very different looks out of the same table.

Thanks for joining me at Home Sweet Home!  
Now, I would like to feature some wonderful post from last week's Home Sweet Home.  

Mary at Home is Where the Boat Is did a gorgeous butterfly tablescape on the water's edge.  Click link to view.

 Next, Rosemary at Villabarnes showed us how to use Gesso to "paint" an old world finish.  Click the link to view.

Tricia, over at A Rosy Note had a really cute bedroom remodel for her daughter.  Click the link to view.


One Shabby Chick showed us summer in her living room.  Which was beautiful. Click the link to view.

And last, The Pear Tree Cottage showed us a fabulous fireplace makeover.  Click the link to view.

Now onto today.
I will join these ladies today:
Seasonal Sundays  at The Tablescaper
Show and Tell Friday at My Romantic Home
A Vintage Summer at Common Ground
A Shabby Cottage Summer at French Country Cottage
Joining the week long blog party at Common Ground and French country Cottage.

Guidelines for Home Sweet Home Party:
Attention: To link up with inlinkz you must have a permalink back to this party in your post or they will not allow you to link.  If you find your link deleted, add the link, and then try again.  (I have been deleting a few links.  Inlinkz sets the rules.)
My button is on my sidebar for the party, if you want to use it.   If you are new here I hope you will become a follower.  No Etsy link ups or direct advertising, please.  Please visit some of the other blogs and get some great inspiration.  Thanks.:)
Now let's see your beautiful homes!


Wednesday, June 22, 2011

Glow in the Garden

Our crabapple has bloomed and it is a rare year that it feels more like May than April. With the spring transformation going on in the garden, I took full advantage of that by having a little table set up. (This is a re-post from 2010.)


The sun will set soon but it is a beautiful night. Come and sit a while and let's enjoy the view.
Romantic is the mood that is set. 
I don't care for perfection. I like even my flowers to be losing petals and a little shabby.
You can never have too many flowers....

shells...
or candles.
If you can invite some cherubs from the sea...all the better.
Our sherbet is filled with strawberries and kiwi with a dessert wine sauce. Garnished with a mint leaf and a violet.
The white porcelain dinner plates are from Walmart, the salad plates from the thrift store, and the sherbets also from the thrift store.
The goblets are Longchamp by Cristal D'Arques from Macy's.
The silver is English Gadroon by Gorham. 
Walking to the table I picked a hyacinth and a few sprigs of rosemary for the lovely smell.
The sun is about to set.
Here comes the glow.
Clear the dishes....
and enjoy.  You can view this tablescape in my movie format also.


I will join the Summer Blog Party with this.  This entry goes to:
Summer Entertaining at No Minimalist Here. 

Tuesday, June 21, 2011

Makeover of a White Chest


We bought this chest in 1991. The last time I did anything to the finish it I was 8 months pregnant with my first child.  I remember it being cold and me painting it in the garage with Kilz.  We used it as a dresser in the nursery and the top was a changing table.  I shopped the house when we grew a dining room with our new addition and it became a little sideboard for the new space.  But every time I walked by it, the chest just kept reminding me of the nursery. So the week my 5 year-old went to kindergarten, I used this chest to adjust to the fact that no more of our babies will ever be in the house, a melancholy week for me.  So, it was time for this chest to grow up too.  
(This is a re-post from 2010.)


I stripped the white paint off of the chest.  This is the stripper I used.

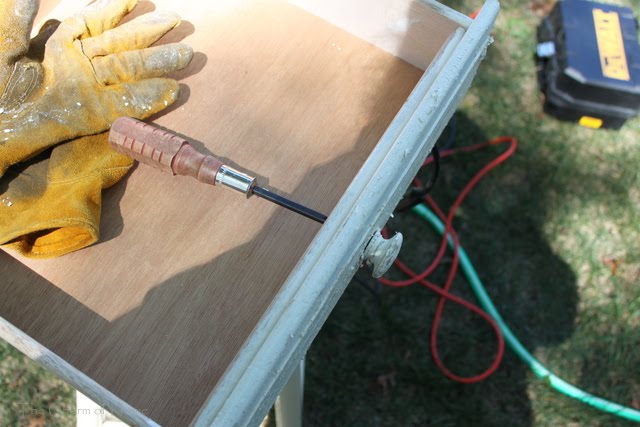
I started with a drawer to see how this stripper worked.  I have stripped a piece of furniture before but it was a few years ago.  

The stripper worked really good.  As you can see the paint came right off but, the primer has to be sanded off.  Thank goodness for my orbital sander.

The knobs are coming off for a hand sanding later.

Here is the drawer after sanding with the orbital sander.

After the orbital sander I switched to the sanding sponge with a medium grit to get as much of the white paint off as I could.  But if you notice, I don't get it all off.  I like the look of the white paint in the dings and grooves.  It gives the appearance of something antique with white milk paint in the cracks.  


After a good dusting, it is time to pre-treat the wood before staining it.  I used Minwax Pre-stain.  I would think it is a mix of Linseed oil and mineral spirits.  Although, I couldn't find the ingredients on the label.  (The rags used from this step become highly combustible dispose of them carefully after use.)

 
The natural pine on this chest is pretty, but I wanted a richer color so I decided to stain it.  I used Miniwax Polyshades in Pecan Satin.  This was the warm tone I was going for.  Note: the pine wood has to be pre-treated before the staining.  It is a soft wood and the wood fibers will take the stain very uneven without a pre-treatment.  The pine still doesn't take the stain perfectly even being that chest is made of many pieces of wood that will all take the stain differently.  

 The final step is to "sand" again with a #0000 grade steel wool.  This puts a satin smooth finish on the wood.  After you can again apply another layer of stain and "sand" again with the steel wool and then you are done.


I hand sanded the knobs entirely with a coarse grade sand paper and the sanding sponge.  I would believe the knobs are made of a different wood entirely because they were a lot darker than the pine.  Here the knobs are after pre-treatment and stain done in the same manner as the chest and I have them drying between the slats in our swing.

 
So, here is my little nursery chest all grown up.  It will work for now until someday we find the perfect buffet or hutch.  

 Now I have somewhere to put all my seasonal decorations.
 I will link this to the week long blog party.  This entry goes to:
Drop Cloth Projects at My Uncommon Slice of Suburbia