Showing posts with label Metamorphosis Monday. Show all posts

Sunday, July 17, 2011

Cabinet Makeover

The husband has been home all week and we did a little spontaneous bathroom remodel.  It was a twenty-nine year old bathroom with all original fixtures.  Today I am going to show you the makeover of the vanity cabinet.   Here is the before.  It is bad isn't it.  Most homeowners would probably pitch it.  But, we didn't plan any budget for this so we painted it.

I started with paint I already owned and this was Georgian Green a Benjamin Moore color.  It just was too yellow, maybe for another project.  I would love a chair this color. 

I started to mix my own paint with gesso.  You can read more about that here.  This color was too dark for what I was wanting.

This is what I was wanting.  This is a gray mixed with the above color. 


Here is the finished cabinet.   I distressed it a little and glazed it with a Valspar mocha glaze.  I spray painted the hardware oil rubbed bronze.  I'll put the paste wax on it later this week.  It is still a little tacky since I put three coats on it. 

 This is the only picture I have of the cabinet in place for a before comparison.  We have raised three boys and this was the one room that really took a beating.

So, it is looking much nicer.  We are still caulking and painting trim.  I will wait and show you the rest later.  We did all of the work, including the drywall with a knockdown finish.  
Thanks for stopping by.  
 Sherry
I will link to:
Metamorphosis Monday at Between Naps on the Porch

Tuesday, June 21, 2011

Makeover of a White Chest


We bought this chest in 1991. The last time I did anything to the finish it I was 8 months pregnant with my first child.  I remember it being cold and me painting it in the garage with Kilz.  We used it as a dresser in the nursery and the top was a changing table.  I shopped the house when we grew a dining room with our new addition and it became a little sideboard for the new space.  But every time I walked by it, the chest just kept reminding me of the nursery. So the week my 5 year-old went to kindergarten, I used this chest to adjust to the fact that no more of our babies will ever be in the house, a melancholy week for me.  So, it was time for this chest to grow up too.  
(This is a re-post from 2010.)


I stripped the white paint off of the chest.  This is the stripper I used.

I started with a drawer to see how this stripper worked.  I have stripped a piece of furniture before but it was a few years ago.  

The stripper worked really good.  As you can see the paint came right off but, the primer has to be sanded off.  Thank goodness for my orbital sander.

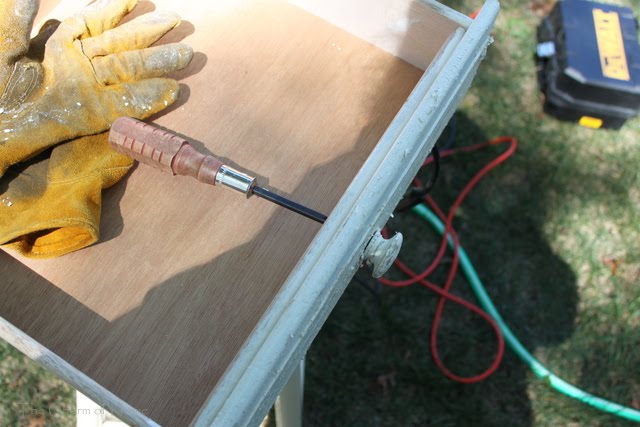
The knobs are coming off for a hand sanding later.

Here is the drawer after sanding with the orbital sander.

After the orbital sander I switched to the sanding sponge with a medium grit to get as much of the white paint off as I could.  But if you notice, I don't get it all off.  I like the look of the white paint in the dings and grooves.  It gives the appearance of something antique with white milk paint in the cracks.  


After a good dusting, it is time to pre-treat the wood before staining it.  I used Minwax Pre-stain.  I would think it is a mix of Linseed oil and mineral spirits.  Although, I couldn't find the ingredients on the label.  (The rags used from this step become highly combustible dispose of them carefully after use.)

 
The natural pine on this chest is pretty, but I wanted a richer color so I decided to stain it.  I used Miniwax Polyshades in Pecan Satin.  This was the warm tone I was going for.  Note: the pine wood has to be pre-treated before the staining.  It is a soft wood and the wood fibers will take the stain very uneven without a pre-treatment.  The pine still doesn't take the stain perfectly even being that chest is made of many pieces of wood that will all take the stain differently.  

 The final step is to "sand" again with a #0000 grade steel wool.  This puts a satin smooth finish on the wood.  After you can again apply another layer of stain and "sand" again with the steel wool and then you are done.


I hand sanded the knobs entirely with a coarse grade sand paper and the sanding sponge.  I would believe the knobs are made of a different wood entirely because they were a lot darker than the pine.  Here the knobs are after pre-treatment and stain done in the same manner as the chest and I have them drying between the slats in our swing.

 
So, here is my little nursery chest all grown up.  It will work for now until someday we find the perfect buffet or hutch.  

 Now I have somewhere to put all my seasonal decorations.
 I will link this to the week long blog party.  This entry goes to:
Drop Cloth Projects at My Uncommon Slice of Suburbia


Sunday, February 6, 2011

Mantel Change Up

I have been very slow to do anything with my mantel this winter.  It looked like this through January.

A lot of it was leftover from my Christmas decor, pictured here.

But, I am getting 'cottage fever' and needed to change things up.  So, I brought this large cottage print out to the living room from my dining room and placed it here.   I really like it in this spot.


I placed a cloche on some tattered old books and some feather picks in an urn.  It seems unless it is a holiday, less is more on the mantel.

The candles smell so good and warm us on the cold winter days.  Speaking of the weather, thank you so much for all the warm wishes about taking care in the winter storm!!!  You blogging buddies are some of the most wonderful people!  I am humbled daily by your generous spirits!  Again, thank you!:)

 I will link this to:
Metamorphosis Monday at Between Naps on the Porch
Before and After Party at The Thrifty Decor Chick
Show Off Your Cottage Monday at The House in the Roses
Wow Us Wednesdays at Savvy Southern Style
Go and visit for some great new decorating ideas.

Sunday, January 30, 2011

Heart Pincushion

I have been wanting to use this fabric for awhile and I decided to make heart pincushions with it.  It is a little challenging because of the stripe.


On my first attempt I cut the stripe vertical; but, no matter how straight you cut the heart out, the stripe was never centered.

So, I put it away for a few weeks and thought it over and then I saw somewhere a heart cut out at a diagonal.  This solves the problem of the stripe.

Now, the stripe looks good anywhere it is laid out on the heart shape and it sews up nicely.   Little heart pincushions are such a sweet treat for a Valentine with out any calories.  I will have three available in my Etsy shop.  
I will link this to:
Metamorphosis Monday at Between Naps on the Porch  
Masterpiece Monday at Boogieboard Cottage 
Make It For Monday  at Cottage Instincts
Market Yourself Monday at Sumo's Sweet Stuff
Amaze Me Monday at Dittle Dattle
Making the World Cuter at making the World Cuter 
Market Monday at Etsy Cottage Style
Made By You  at Skip to my Lou 
Tute {Yourself} Tuesday at Little Eme
Market Monday at Etsy Cottage Style
Handmade Monday  at Olga's Home & Garden Blog

Sunday, January 23, 2011

Me'tamorphose D'une Lamp

 aka: Makeover of a Lamp
I have a little light.  It was given to me.  It sorta has a department store/maybe Kirkland's feel about it.  I decided I would try to make it look more French.  

The lamp had an urn style, which was really good.  I liked the overall design of it, I just wasn't digging the color painted on the relief design.  

So, instead of spray painting the whole lamp and loosing the wonderful patina it had I decided to highlight the relief with a gold Rub n' Buff.   It was so easy my five-year-old gave it try.  

The lamp shade was dated, so I thought I would give that a new look too.  The first thing I did was take the trim off.

I left the velour on the outer part of the shade because, the lining was in great shape and I didn't want to destroy it and they seemed to be connected.

But, just because I left that velour on it I didn't have to look at it, so, I covered it with a white linen.

 I have the linen on and now I will trim the overhang.

I then used a super tacky craft glue and added a pre-made trim.

So, here it is before on the left and after on the right.  Freshening up the lamp's look seem to work.  I liked the way it looked now.

Sneak peak at White Wednesday.
I will join these links:
Go and visit these wonderful blogs. 
Metamorphosis Monday at Between Naps on the Porch
Masterpiece Monday at Boogieboard Cottage 
Re-Party  at First a Dream
Amaze Me Monday at Dittle Dattle
Boring to Better Party at Savvy Southern Style

Sunday, January 2, 2011

Makeover with a Wall Mural

Today I wanted to show you a wall mural.  This is not my home but a relative's home I visit at Christmas.  This image above is the before.  What you are looking at is a dining room and the top of the wall was a suede color and the bottom was faux painted a cordovan color to look like leather.   They have recently repainted the walls and had an artist paint a mural all around the dining room.

The bottom has been given texture by being rag rolled and the dry brushed with the caramel color over the turquoise.  Above the chair rail the caramel has been brushed on the turquoise heavier to cover more of that color and to depict a forest.  Then above the tree mural the turquoise is allowed to show through to portray the sky.  The entire mural was pressed with cheesecloth when the painting was finished to give it the texture of a tapestry.

They artist has taken into account the furniture and painted around the placement of it.  Also, they painted right into the air intake vent, not to disturb the tree's form.

Careful consideration is given to the placement of the art that is hanging so that the art on the wall mural will compliment it.

Isn't this tree in the corner cute.   I love the colors chosen for this mural they flow perfectly with the furniture and the other art in the room.
I will link this to:
Metamorphosis Monday at Between Naps on the Porch
Before and After Party  at Thrifty Decor Chick 
Masterpiece Monday at Boogieboard Cottage 
Re-Party  at First a Dream
Amaze Me Monday at Dittle Dattle
Boring to Better Party at Savvy Southern Style
Go and visit these ladies and view the wonderful things going on.

Sunday, December 12, 2010

Transform Ornaments Into Place Card Holders

*I am re-posting this from last year.  It is such a great idea.  I have taken new pictures, because last year's pictures were not very good.
I have been noticing the ornament place card holders that so many bloggers have used in their tablescapes, but just four of them were $20.  Procrastination has paid off.  Last week on the Today Show (this was 2009) they demonstrated how to make them.  Here's how it is done.
Supplies:
Old glass ornaments (that you don't care to use on your tree)
glass ornaments you want to use for place card holders
hot glue gun
popsicle stick

  • First, take the old glass ornament you don't care for and remove the hanging hook.
  • Take the hook and put it together with the hook from the ornament you want to make a place card holder out of.   NOTE: The tops of the ornaments need to be almost the same size or this will not work.  All hooks are not the same size and they don't always fit into the ornament of choice.
  •   Place both hooks into the desired ornament.
  • Next, take desired ornament and cover the bottom with hot glue.  This should make a base, so the ornament can sit upright.  If you need to smooth the bottom with a popsicle stick while the glue is still hot.  This should give you the base you desire.
The ornament will stand on it's own and you have created a place card holder!  Enjoy it on your tablescape.
I will join these ladies, go and visit them.
Metamorphosis Monday at Between Naps on the Porch 
Make It For Monday  at Cottage Instincts
Re-Party at First a Dream 
Just Something I Whipped Up  at The Girl Creative
Market Yourself Monday at Sumo's Sweet Stuff
Get Your Craft On at Today's Creative Blog
Whatever Goes Wednesday  at Someday Crafts