Showing posts with label Make It for Monday. Show all posts

Sunday, January 30, 2011

Heart Pincushion

I have been wanting to use this fabric for awhile and I decided to make heart pincushions with it.  It is a little challenging because of the stripe.


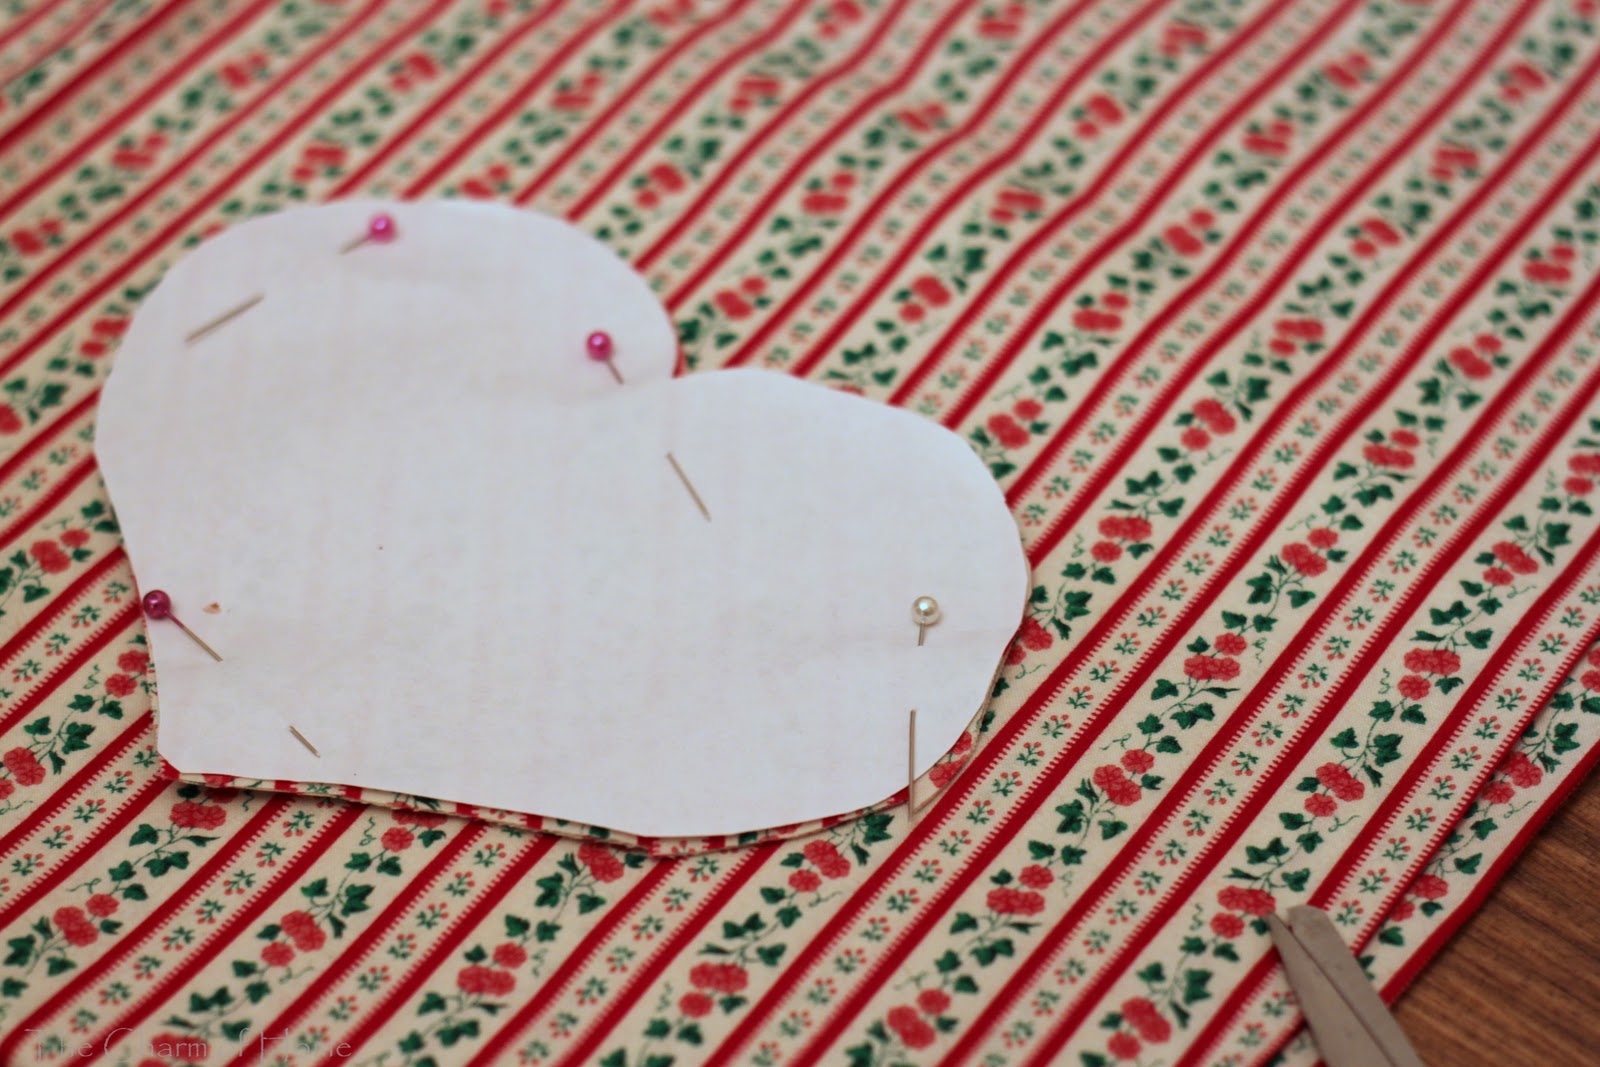
On my first attempt I cut the stripe vertical; but, no matter how straight you cut the heart out, the stripe was never centered.

So, I put it away for a few weeks and thought it over and then I saw somewhere a heart cut out at a diagonal.  This solves the problem of the stripe.

Now, the stripe looks good anywhere it is laid out on the heart shape and it sews up nicely.   Little heart pincushions are such a sweet treat for a Valentine with out any calories.  I will have three available in my Etsy shop.  
I will link this to:
Metamorphosis Monday at Between Naps on the Porch  
Masterpiece Monday at Boogieboard Cottage 
Make It For Monday  at Cottage Instincts
Market Yourself Monday at Sumo's Sweet Stuff
Amaze Me Monday at Dittle Dattle
Making the World Cuter at making the World Cuter 
Market Monday at Etsy Cottage Style
Made By You  at Skip to my Lou 
Tute {Yourself} Tuesday at Little Eme
Market Monday at Etsy Cottage Style
Handmade Monday  at Olga's Home & Garden Blog

Sunday, June 13, 2010

Metamorphosis Monday

This is the beginning of several changes I am working on in the dining room.  Our house had a major remodel two years ago and an existing living room became a dining room.  But, the problem being, we had no dining room furniture.  So, slowly I have been taking free furniture from family and shopping the house to "creatively" furnish this new space.

One of the great free items I came up with was a print of a cottage.
Now, I know everyone is stopping right here and saying okay where is the before picture.  This is what the wall; where the cottage print is hanging, looked like before.  It had bookcases on it.
So, the change I am showing to you today is really just some sconces.  I had these from Pier 1.  They are from the 80's.  They had been in storage a long time and I pulled them out and decided to try them out with a new coat of spray paint.
 Here they are after some oil rubbed bronze spray paintYes, I know I am missing a candle.  Hobby Lobby only had one candle.  When I get a chance I will get another one.  I am not done with this wall.  I plan to do  more changes to these pieces and their finishes.  But, here is my progress so far.  Poll:  Do you like the dark frame around that print or would you lighten it up?   I am leaning toward lightening up the color.
I will link this to:
Metamorphosis Monday at Between Naps on the Porch
Make It for Monday at Cottage Instincts
Show Off Your Cottage Monday at The House in the Roses
Please join these ladies and enjoy all that is going on at their sites.

Sunday, May 23, 2010

Metamorphosis Monday: Lamp Makeover

I needed a lamp and I knew what I wanted.  I wanted something similar to this lamp from Pottery Barn.
Image from Pottery Barn
Instead of filling the base of my lamp with a silk fern or driftwood I wanted to fill my lamp with shells. 
Image from Pottery Barn
Here is another lamp from Pottery Barn that is filled with shells.  This is the look I am aiming for but with a simpler lamp base.
I found this lamp at the thrift store.  These lamps were popular in the early 1990's.  I have one that I bought at that time.  The base has a wing nut that will unscrew and you can fill the lamp with objects, such as in the Pottery Barn lamps pictured above.  I wanted to update this lamp and get rid of the brass finish.  So, I took the lamp apart and taped all  the areas that might be sprayed by the  spray paint  I am using to refinish it.  
Here is how it turned out.   I used white spray paint first but it didn't take to the finish due to some flaws on the brass finish originally.  So, I repainted it with a textured sandstone color that is made for outdoor metal furniture and it took really well.  
The total cost of my lamp makeover:
Lamp $4
spray paint around $5
shade (also found in excellent condition at thrift store) $3. 
Total =$12  
I will link this to Susan's Metamorphosis Monday at her site Between Naps on the Porch.
Also, Just Something I Whipped Up at The Girl Creative.
Also, Today's Thrifty Treasures at Southern Hospitality.
And, Make It for Monday at Cottage Instincts.
Please visit these sites and check out all the great projects.

Saturday, April 17, 2010

Shop the House: Creative Lighting

Image from Pottery Barn
 I have seen these canning jar lights in Pottery Barn's catalog and I had every intention of making them.  So I was so inspired the other night when it was about 45 minutes till dark and my son (5 yr. old) was playing in the yard.  I walked over to this shrub we have that the 5 yr. old has severely pruned and it was ever so romantically dropping these fabulous smelling blossoms all over the ground.  Thinking in my head, "Boy, tonight would be a great night to set a table up under that shrub.....with those Pottery Barn lights I have been planning on making..."   "Honey, you keep playing and mommy will be right back I'm going to start a project."   

 So, make them I did by shopping the house.  All of my jars were not the same size.  But, I used what I had and it took a dispenser of galvanized wire, wire cutter, the jars, tea light candles, and some white ribbon.  I didn't twist the wires.  I just used a single wire.

 This is how they turned out.  You can see more of the lighting for my tablescape this Thursday.
Image from Pottery Barn

Okay, I also had been planning to copy this look from Pottery Barn.  It worked out with this tablescape I set up. 

My version is a lot different but, I thought somewhat achieved the look.  What is this you ask?  

 This is a cigar mold.  There is still tobacco in the mold.  It's an antique from my  Great-grandfather.  

 There is some writing on it, that I haven't even noticed until I had it in the natural light today.  
 This is how my lighting turned out with the cigar mold.  When I got up the next day all the blossoms were off of the shrub.  Time was of the essence. Check back Thursday to see the whole tablescape. 
I am joining Kendall over a t Finesse Your Nest for Shop the House Sunday.
I will also join Diana at her site The Girl Creative for Just Something I whipped Up Monday.
I will also join Rhoda at her site Southern Hospitality for Today's Thrifty Treasures.


Sunday, April 4, 2010

Metamorphosis Monday: Tray Makeover

I am joining Susan for Metamorphosis Monday at her site Between Naps on the Porch.  I will also add this to Make It For Monday at Cottage Instincts.  And, I will also add this to the Before and After Party at Thrifty Decor Chic.  I had a cutlery tray that went with my old pattern of dishes I used for everyday.  The pattern was Yorketown by Pfaltzgraff.  I don't use the pattern anymore and I thought I could remake this  and get a really cute tray out of it that I could use more.


 Here is what I started with.


I removed the decoration on the tray.
 
I sanded it first and then I prepared to spray paint it white.
I then spray painted it white.
While the multiple coats of spray paint were drying.  I came up with a design to put on the tray where I had taken the ceramic decoration off.  I used the old decoration to trace the shape on the design of my choice so it would fit nicely on the tray.  Now, I will tell you more about where I got these images from later this week. 
 

 I sanded some edges of the tray to age it a little.  Then I used Mod Podge to apply the shell design to the tray.


Luckily I earned a merit badge in knot tying with the skill of a sailor.  So, to give my tray a little coastal flair I tied some rope on and used a tacky craft glue to finish it off.  I am really looking forward to using it for summer.  Please go over to Susan's, Cindy's, and Sarah's sites and see all the makeovers.


Monday, March 22, 2010

Easter Basket Project

I will be joining Kim for Basket Dayz at her site Cheap Chic Home.   She will love to have you if you have any kind of spring/Easter basket project to show off.
Supplies: Basket
                 3 or more yards of ribbon for handle
                 A embellishment for ribbon (like a flower)
                 1 1/2 -2 yards of bridal Tulle (the fuller the basket will be, the more tulle you will need) 

 I started out with a white basket that originally was in the nursery when I had each boy.  Yes, they started out shabby chic, until I had to give them more manly furnishings!

I made a loop and took the ribbon through it like so.

I put a good knot in that loop and then I started lacing the handle.
You continue to lace back and forth till you have come to the end of the handle.

Make sure it is all good and tight.  Then give it another good knot on this side of the handle.  You don't want it slipping and coming undone during the big hunt.

Take a 4 inch strip of tulle cut with the width of the fabric and fold it back and forth till it looks like this.

Then fold your tulle and cut a triangle out of each top corner.  This is just like making a bow.  We are making a tulle bow.

Unfold your tulle again and tie and knot it with the triangular cut outs being right where you are going to knot the ribbon.

You can now pull the tulle out and fluff it up, just like you do when making a bow.

Continue to shape the tulle till you get the desired look.
You can put any embellishment you want in the center of your tulle bow.  You can put silk or real flowers.  I found this little bunny pin at the thrift store and I am using him on this basket.

Now here is the best part!!!
Do you hate Easter grass?  Do you find it in July in the hall and under the couch?  I did.  So when my boys were little we threw away our Easter grass and we stuffed our baskets with tulle!  It works fantastic.  It is a perfect cushion for the eggs.  It looks good and it is not messy.  I used royal blue and green when the guys were small in each of their baskets.

There you have it, an Easter basket or it would work equally well for a flower girl basket. 
Please got to Kim's site Cheap Chic Home add a basket project or see what every one else is doing.

I will also add this to the following:
Motivate Me Monday at Keeping It Simple